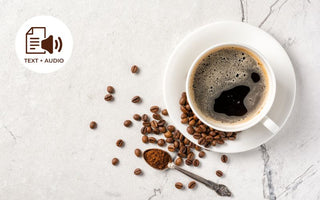
One of the most common questions that we get at the Japanese Coffee Company is “What is the best way to brew Japanese Sumiyaki coffee?” And the answer is, you can enjoy it using your favorite brew method, whatever that is. You just need to choose the right grind size.
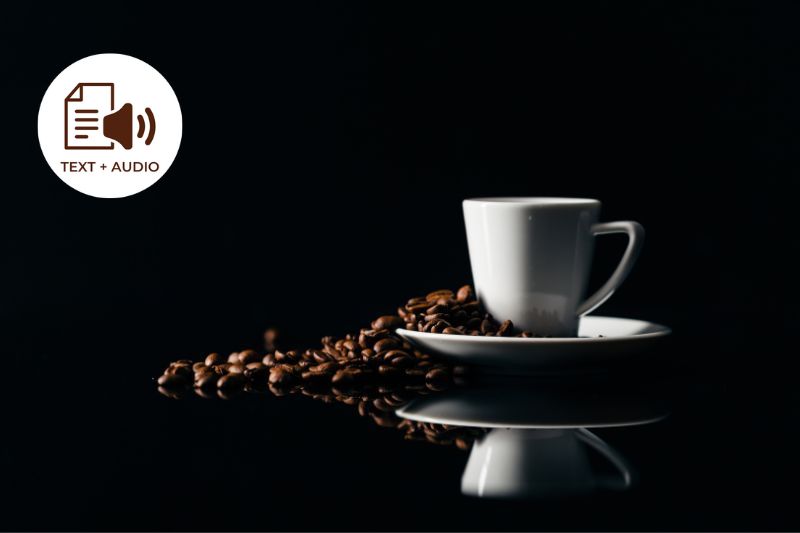
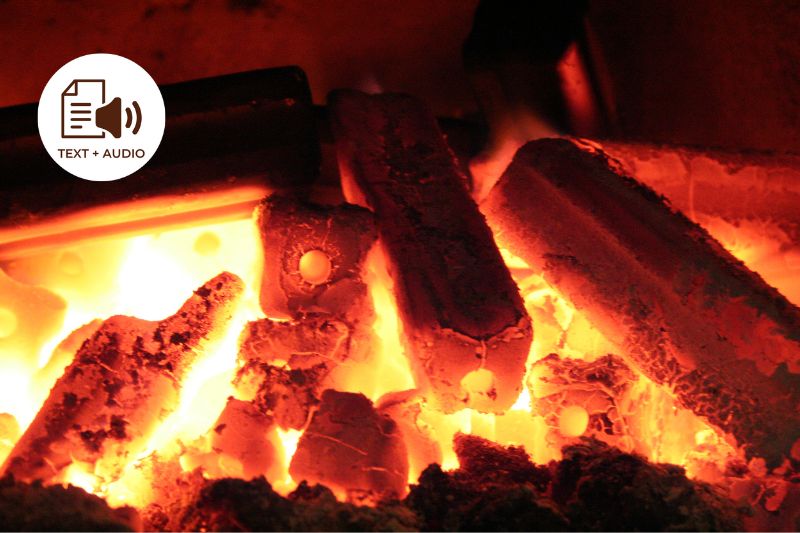
Sumiyaki coffee is made through a unique roasting process. Unlike most traditional coffees, which use hot air to crack the beans to bring out their flavor and aroma, Sumiyaki coffee beans are charcoal roasted. This creates a stronger, full-bodied coffee with a smoky aroma.
If you’re interested in tasting this special Japanese coffee, and curious about how to brew the perfect cup, keep reading below for our recommendations. Each level of coffee grind is best suited for a certain brewing method. This quick guide covers the 6 types of ground and whole bean coffee that we offer, and how to brew them into a tasty cup of coffee. Which one you choose is up to you and your personal taste.
Grind for Espresso

This coffee, ground for brewing espresso, is extra fine. That means it is the smallest size, similar to sugar. The process of brewing espresso is very short and intense, so you need a fine coffee grind, to extract the right amount of flavor from the beans. Brewing a shot of espresso typically only takes about 30 seconds.
Espresso is made with high temperature water and high pressure. The water temperature is about 195°F, and the pressure can reach up to 9 – 10 bar. Usually, this requires an espresso machine, which can be expensive.
But if you don’t have an espresso machine, a Moka Pot is a good alternative for espresso-like coffee. In this case, you’ll also need a stove for brewing, which is why a Moka Pot is often called a stovetop espresso maker. It consists of three different chambers. The bottom chamber holds the water, the middle filter basket contains the coffee grounds, and the top chamber collects the finished coffee.
Moka Pots can’t achieve the same high pressures as an espresso machine, but they do create about 1-2 bar of additional pressure. This allows the coffee to brew at the high temperature, and force the water up through the coffee grounds.
Grind Size: Extra Fine
-
Similar to the size of sugar
-
Grinding Guide
-
Here are most common grinder and recommended setting for grinding for espresso. (If you do not have proper grinder, we grind for you - select "Grid for Espresso" option on product page).
-
Espresso Machine
-
Baratza Encore: #5
-
Baratza Virtuoso: :#5
-
Capresso Infinity: #5-7
-
Bodum Bistro: Espresso Icon (far left):
-
Moka Pot
-
Baratza Encore: #12
-
Baratza Virtuoso: :#12
-
Capresso Infinity: Fine #2 - Medium #1
-
Cuisinart Supreme Grind: #2-5
-
Bodum Bistro: Espresso Icon + 1:
-
Mr Coffee Burr Grinder: #2-4
-
Equipment Needed
-
Espresso machine, or
-
Moka Pot
-
Stove
-
Kettle
Steps for Brewing with a Moka Pot
1. Pour boiling water into the bottom of the Moka Pot to the fill line.
- Pre-heating the water with a kettle keeps the Moka Pot from getting too hot, which can cause your coffee to take on a metallic taste as it gets burnt.
2. Add fine grind coffee to the filter basket until it is full, and place the basket in the bottom of the pot.
- Moka Pots come in different sizes for the number of cups (or shots) of coffee that they make. The water fill line and size of the basket are designed to give you the right ratio of coffee grounds to water.
- You can level off the filter basket with your finger, but you don’t need to compact the grounds like you do with an espresso machine.
3. Screw on the top of the Moka Pot, and place it on the stove over medium heat.
- Leave the top lid open, so that you can see the coffee entering the upper chamber. You’ll have to watch the process to know when it’s done.
- You’ll learn the right level of heat from your stove by practicing. If the finished coffee is barely bubbling over into the upper chamber, turn up the heat. If the coffee shoots up through the top, turn the heat down.
4. Brew until the coffee spilling out into the upper chamber turns a lighter honey color, and the water in the bottom of the pot has all evaporated.
- This should take about 5 minutes.
- When you’re done brewing, run cold water over the bottom of the Moka Pot to stop the extraction process.
Steps for Brewing with Nesspresso Type Coffee Machine
1. You can use Resuable Nespresso filter such as this one to brew Sumiyaki coffee using Nespresso machine.
(There are two types of Nespresso Capsule. Click here for the Original Nespresso Machine Type Resusable filter, Click here for the Vertuo Capsule Resusable filter)
2. Depends on your preference, add 5.5g - 7g of Sumiyaki coffee in the single Reusable Nespresso filter.
Note: If you are using K-Cup Machine, please use Paper Filter Grind instead of Paper filter Grind. Click here for K-Cup instruction
Coffee to Water Ratio
-
Espresso: 6 – 8 grams of coffee for 1 oz of water
-
Makes one shot of espresso
-
Moka Pot: 4 – 5 grams of coffee for 1 oz of water
-
Makes one shot of espresso-like coffee
-
Or use the water fill line and filter basket as your guide
Pros of Grind for Espresso
-
Rich flavor
-
Strong, concentrated coffee
Cons
-
More difficult brew method
-
Makes smaller quantities of coffee
-
Expensive if you invest in an espresso machine
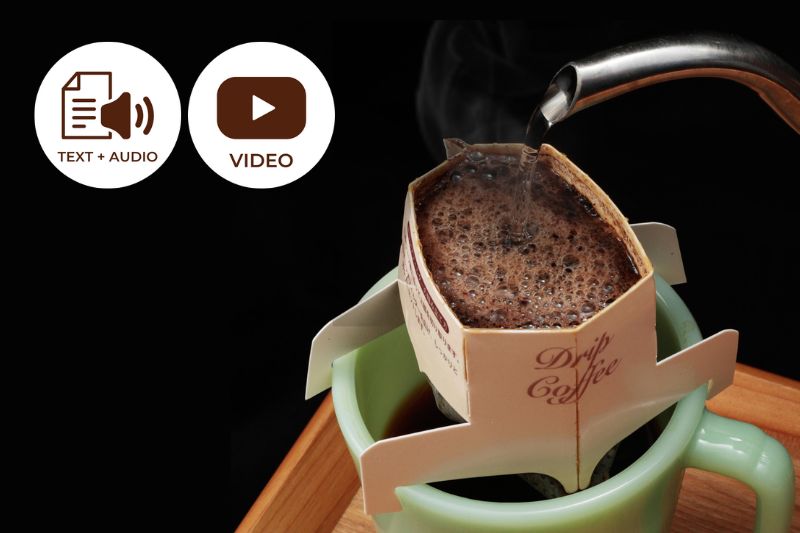
Grind for Paper Filter

Our grind for paper filter brewing methods is medium-fine in size. It is ideal for brewing pour-over coffee, drip coffee using a standard coffee maker or use for Keurig (k-cup) type machine.
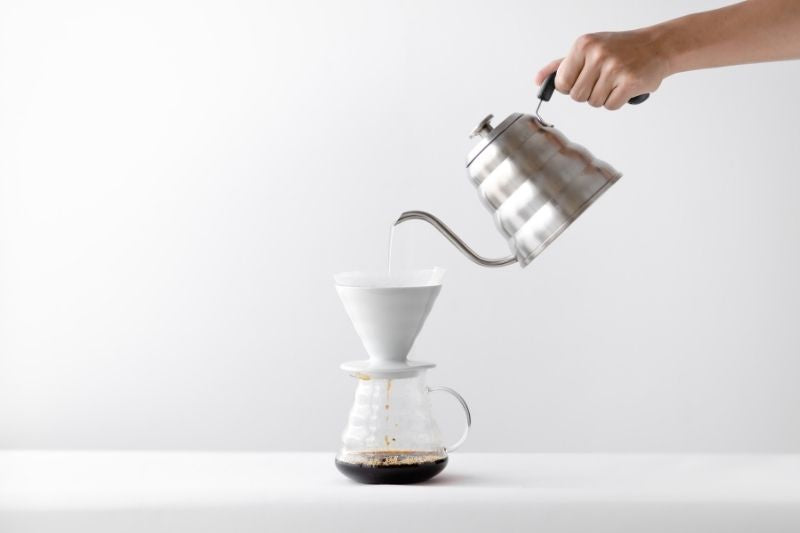
Pour-over coffee is a manual brewing method that, similar to drip coffee from a typical home coffee machine, lets hot water flow down through the coffee grounds. The water extracts flavors and aroma as it drips through the coffee grounds and filter paper, and collects in a cup or pot below.
If you’re using a drip coffee machine, then the water temperature and brew time are usually controlled for your automatically. This makes your morning routine much easier, but doesn’t give you as much flexibility to experiment. The ideal water temperature for brewing paper filter coffee is between 195°F to 205°F. When brewing a pour-over cup of coffee, you’ll want to monitor the temperature of your water to make sure you get the best flavor.
Brewing pour-over coffee doesn’t require a fancy machine, and can be done without any power. A small dripper that holds your paper filter and coffee grounds is placed on top of your coffee cup or coffee pot, and hot water is hand-poured over it in several different stages. The only other thing you need is a kettle to supply hot water for brewing.
A gooseneck-style kettle is best for pour-over coffee brewing because of it’s narrow spout. It allows you to have more control over the flow of water. The stream of water determines how well the coffee will be extracted from its beans. And the better the extraction, the better your coffee will taste.
Grind Size: Medium-Fine
-
Similar to the size of table salt
-
Grinding Guide
-
Here are most common grinder and recommended setting for grinding for paper filter. (If you do not have proper grinder, we grind for you - select "Grid for Paper Filter" option on product page).
-
Flat filter drip machine:
-
Baratza Encore: #20-25
-
Baratza Virtuoso: :#20-25
-
Capresso Infinity: Medium #2
-
Cuisinart Supreme Grind: #10-13
-
Bodum Bistro: Chemex icon - 1
-
Mr Coffee Burr Grinder: #10-#12
-
Cone filter drip machine:
-
Baratza Encore: #15
-
Baratza Virtuoso: :#15-30
-
Capresso Infinity: Medium #1 - Coarse #1
-
Cuisinart Supreme Grind: #10-15
-
Bodum Bistro: Chemex icon + 1
-
Mr Coffee Burr Grinder: #8-#10
-
Hario V60:
-
Baratza Encore: #14
-
Baratza Virtuoso: :#13
-
Capresso Infinity: Fine #4 - Medium #1
-
Cuisinart Supreme Grind: #4-6
-
Bodum Bistro: Drip icon - 2.5
-
- Chemex
- Baratza Encore: #21
- Baratza Virtuoso: :#20
- Capresso Infinity: Medium #2 - Coarse #1
- Cuisinart Supreme Grind: #8-10
- Bodum Bistro: Chemex icon + 1
- Mr Coffee Burr Grinder: #5-#10
-
Karita Wave
-
Baratza Encore: #14
-
Baratza Virtuoso: :#13
-
Capresso Infinity: Fine #4 - Medium #1
-
Cuisinart Supreme Grind: #4-6
-
Bodum Bistro: Drip icon - 2.5
-
Equipment Needed
-
Pour-over dripper
-
Paper filters
-
Kettle
-
Or a coffee machine
-
Paper filters or a reusable coffee filter
Steps for Brewing Pour-Over Coffee
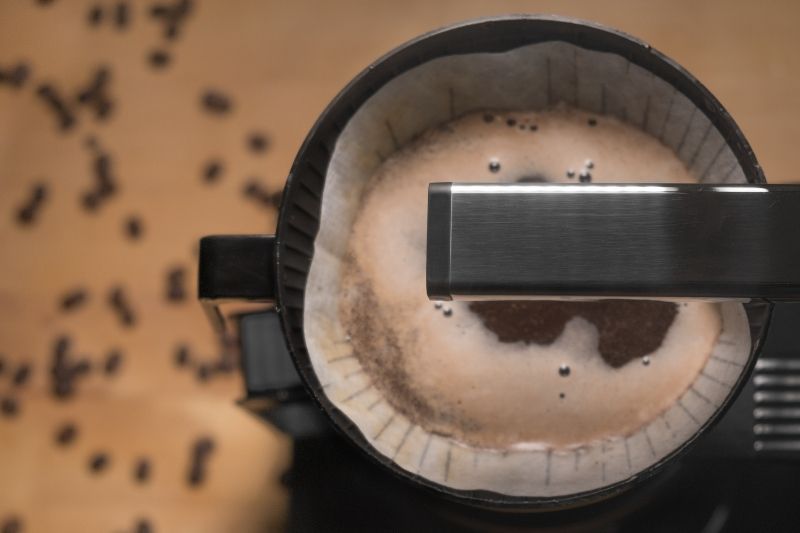
1. Place the coffee dripper over your cup or carafe, and place a paper filter in the dripper.
2. Pre-wet the filter paper with hot water, and discard the water that flows through.
- This will wash away any flavors that the filter paper might have passed on to your coffee.
-
It also brings the filter, and the dripper that is holding it, up to temperature, so that the coffee grounds don’t lose as much heat while brewing.
3. Add the coffee grounds to the filter and begin to slowly pour hot water over them in a circular motion.
- With the first pour, you’ll see the distinctive “bloom”, where the coffee grounds swell.
4. Gradually pour water over the coffee grounds until they are saturated, for about 15 seconds. Then allow the water to drip through to your cup for another 30 seconds or so.
5. Repeat with 2 or 3 more pours until the water is all used up and the coffee is collected in your cup.
- This should take about 3 minutes.
-
Make sure to pour evenly around the entire mound of coffee grounds, including the edges where they meet the filter paper. This will ensure an even extraction.
Steps for Brewing with Standard Coffee Maker
-
You can follow the steps on your Standard Coffee Maker to make a cup of coffee.
-
For the measurement, use 10 grams of coffee for 6 oz of wate. This is known as the “Golden Rule”, often also expressed as a ratio of 1:17 (grams of coffee to grams of water)
Steps for Brewing with Keurig (K-Cup) Type Coffee Machine
-
You can use Resuable K-Cup filter such as this one to brew Sumiyaki coffee using Keurig (k-cup) type machine.
-
Depends on your preference, add 9g - 12g of Sumiyaki coffee in the single Reusable K-Cup filter.
Note: If you are using Nespresso Machine, please use Espresso Grind instead of Paper filter Grind. Click here for Nespresso instruction
Coffee to Water Ratio
-
Automatic drip coffee machine: 10 grams of coffee for 6 oz of water
-
This is known as the “Golden Rule”, often also expressed as a ratio of 1:17 (grams of coffee to grams of water)
-
Pour-over coffee: 10 – 15 grams of coffee for 6 oz of water
-
If you are enjoying a single-origin coffee, we recommend using less coffee. This will bring out the unique tasting notes and allow you to appreciate each distinct flavor.
Pros of Medium-fine Grind
-
Simple process
-
Automated with a coffee machine
-
Pour-over produces delicate coffee, highlighting unique flavors
Cons
-
Slower, manual process when brewing with pour-over
-
Less freedom to make adjustments when brewing with a standard drip coffee maker
Grind for Nel Drip

Nel Drip is another hands-on pour-over process. It uses a cloth filter instead of paper and slightly cooler water to produce deep flavors from your coffee grounds. This grind level is slightly more coarse than the paper filter grind, closer to the size of sand.
This method of brewing coffee first originated in Japan. It uses more coffee grounds than traditional drip or pour-over methods, sometimes twice as much. But, it can be used to brew tasty coffee even from older coffee beans, which might not be ideal for other brewing methods.
Brewing coffee using the Nel Drip method can be tricky. It often takes quite a bit of practice to master the art of making a perfect cup. But it can be done!
Click here to read more about how to brew tasty coffee with Nel Drip
Grind Size: Medium
-
Similar to the size of sand
-
Grinding Guide
-
Here are most common grinder and recommended setting for grinding for Nel Drip. (If you do not have proper grinder, we grind for you - select "Grid for Nel Drip" option on product page).
-
Baratza Encore: #14
-
Baratza Virtuoso: :#14
-
Capresso Infinity: Fine #4- Medium #1
-
Cuisinart Supreme Grind: #4-#6
-
Bodum Bistro: Drip Icon + 2.5:

Steps for Brewing Coffee with a Nel Drip
1. Attach the Nel filter to its hoop, and place over the carafe.
- If the filter is new, soak it in boiling water for 5 minutes before the first use. Then attach it to the hoop and wring it out, to make sure that it is mostly dry.
2. Pre-heat the filter and Nel pot for about a minute by pouring hot water through and discarding it.
3. Add the coffee to the filter and make a small indentation in the center of the mound.
- Don’t compress the coffee grounds.
4. Let the boiling water in your kettle cool slightly, to about 175°F, and then begin to pour slowly around the edges of the coffee grounds in your filter.
5. After the first slow pour of about 45 seconds, allow the coffee to drip into the carafe, and then repeat with two slightly faster pours.
- The total brewing time should take about 3 to 3.5 minutes.
-
You can use any remaining hot water to pre-heat your coffee cups. This will prevent the coffee from losing as much heat when it’s poured, which is especially important with colder Nel Drip coffee.
Coffee to Water Ratio
-
14 grams of coffee for 200g (7 oz) of water
Pros of Grind for Nel Drip
-
Makes thicker, full-bodied coffee
-
Works well with older coffee
Cons
-
Harder to clean the reusable flannel filter
-
Slow brewing method that takes practice
Click here to read more about how to brew tasty coffee with Nel Drip
Grind for Siphon

The grind for siphon brewing is the next step up in size. It is a medium-coarse grind.
Brewing siphon coffee feels a bit like a science experiment. You’ll need a siphon set, a heat source, and a couple minutes of time. The siphon set consists of a bottom chamber called the “bulb” and a top chamber called the “hopper”.
Water starts out in the bottom bulb, and travels up to the hopper as it is boiled into steam. Brewing takes place in the upper hopper chamber, and then the coffee grounds are separated from the brewed coffee through a siphon process. As the bottom bulb cools, it begins to pull a vacuum, which draws the finished coffee back down into the bulb, leaving the coffee grounds behind on the other side of a filter.
Grind Size: Medium-Coarse
-
Similar to the size of rough sand
-
Grinding Guide
-
Here are most common grinder and recommended setting for grinding for Siphon. (If you do not have proper grinder, we grind for you - select "Grid for Siphon" option on product page).
-
Baratza Encore: #13
-
Baratza Virtuoso: :#13
-
Capresso Infinity: Fine #3- Medium #1
-
Cuisinart Supreme Grind: #4-#10
-
Bodum Bistro: Drip Icon + 2:
Equipment Needed
-
Siphon set
-
Heat source
Steps for Brewing with Siphon Coffee
1. Soak the siphon filter for about 5 minutes in warm water and drop into the top hopper.
2. Fill the bottom bulb with hot water and insert the hopper into the bulb.
3. Heat the siphon set until the water boils and enters the top hopper.
- Measure the temperature of your water. It should be between 185°F – 195°F. Turn down the heat source if necessary.
4. Add the coffee grounds to the hopper and submerge them in the water. Allow it to brew for about a minute.
5. Take the siphon off of the heat, and gently mix the brewing coffee a few times.
6. The coffee will draw down into the bottom bulb, leaving a mound of coffee grounds in the hopper.
- The entire process should take approximately 2 to 2.5 minutes.
-
Allow the coffee to cool slightly for a couple minutes, and then pour into your coffee cup.
Coffee to Water Ratio
-
10 – 12 grams of coffee for 6 oz of water
Pros of Grind for Siphon
-
Brews a tea-like cup of coffee
-
Exciting process that’s fun to watch
Cons
-
Precise method that can be hard to master
Grind for French Press

If you are brewing your coffee using a French Press, this coarse grind coffee is the right choice. This process only requires a French Press and a kettle for hot water. It is one of the simplest brewing methods available, and it is very inexpensive.
The grinds and hot water are added to the press together, allowed to brew for about 4 minutes, and then the plunger is pushed down to separate the coffee grinds from the finished, brewed coffee. This method is great for darker roasted coffee, like Japanese Sumiyaki.
Grind Size: Coarse
-
Similar to the size of sea salt
-
Grinding Guide
-
Here are most common grinder and recommended setting for grinding for French Press. (If you do not have proper grinder, we grind for you - select "Grid for French Press" option on product page).
-
Baratza Encore: #30
-
Baratza Virtuoso: :#30
-
Capresso Infinity: Coarse #1
-
Bodum Bistro: French Press icon (far right)
Equipment Needed
-
French Press
-
Kettle
Steps for Brewing Coffee with a French Press
1. Remove the plunger from the cylindrical carafe and pre-heat the carafe with hot water.
2. Add the coffee grounds to the pot, pouring hot water over them, and stirring gently to make sure that all of the grounds are submerged.
- For the best results, we recommend only pouring in half of the water initially.
-
Water temperature should be just below boiling, at about 200°F.
3. Allow the coffee to brew for 3-4 minutes.
- The coffee will bloom within the first 30 seconds. Once this is done, and your coffee has swelled in volume, you can add the remaining water. This leads to a better extraction, and therefore a better cup of coffee.
-
Place the lid and plunger back into the carafe while brewing, but don’t push the plunger down yet. Allow the plunger to rest just above the surface of the coffee.
4. Push the plunger down in a slow steady motion, trapping the coffee grounds on the bottom of the pot.
- Use even pressure on the plunger.
-
Immediately pour your coffee into your cup or another container to avoid over-extraction, which can lead to a poor tasting cup of coffee.
Coffee to Water Ratio
- 12 grams of coffee for 6 oz of water
- 1:15 ratio for grams of coffee to grams of water
Pros of Grind for French Press
-
Easy process
-
Very affordable equipment
-
Earthy and rich coffee
Cons
-
The wrong size grind can either pass through the plunger filter or cause it to clog.
Whole Beans

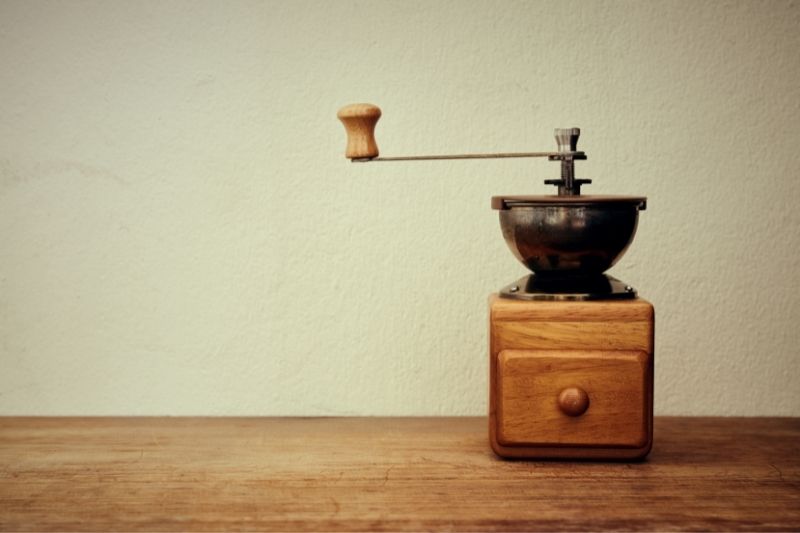
If you want the flexibility to grind your own coffee beans to any size, then whole beans are your best option. This is great if you want to experiment with different brew methods. It’s also the best way to have the freshest coffee grounds for your coffee each day.
Grind Size: Not Ground
-
Whole coffee beans
Equipment Needed
-
We recommend a burr grinder if you have one, but a blade grinder will work too
Pros of using whole bean
-
Can be used for any brewing method
-
Fresh ground coffee each day
Cons
-
Not as convenient, requires a grinder
-
More time consuming to grind your own beans
So, What’s the Best Way to Brew Sumiyaki Coffee?
The best way to brew a delicious cup of Sumiyaki coffee is to use whatever method you prefer, and choose the right level of grind for that process.
Sumiyaki, or charcoal-grilled coffee produces a unique flavor profile. Whether you have access to an espresso machine, or you prefer to make your morning coffee using a French Press, this coffee will give you a special taste of Japan that’s like no other coffee that you’ve had before. So, choose your grind size and give it a try!


Get Free Bonus Book